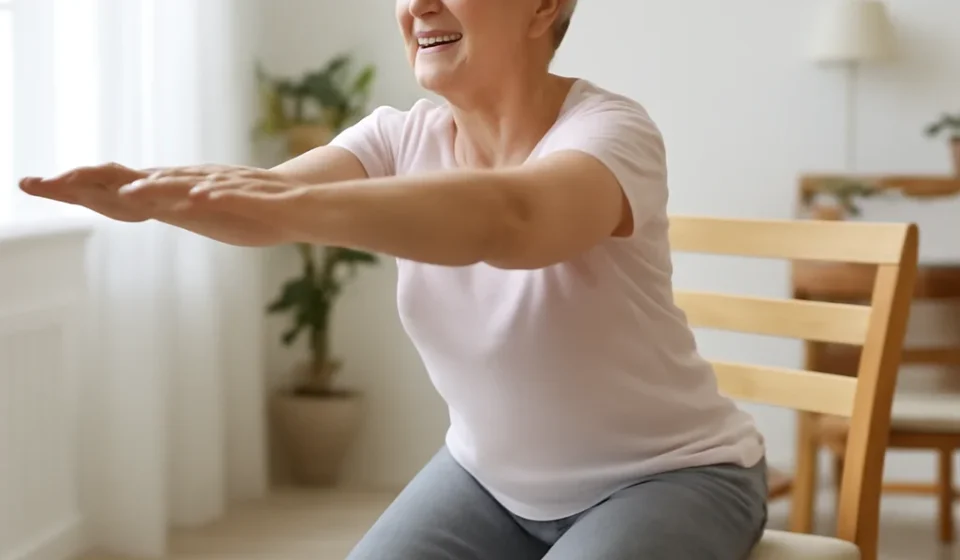

If you can only do one strength exercise for the rest of your life, make it this one. The sit-to-stand exercise for seniors — simply rising from a chair and sitting back down with control — trains the exact muscles you use dozens of times a day to get off the toilet, out of the car, and up from the sofa. It builds the legs and core that keep you independent, and clinicians use the same movement as the gold-standard test of lower-body strength in older adults. Best of all, it needs no equipment beyond a sturdy chair. Here is how to do it correctly, build a simple plan, and measure your own progress.
Table of Contents
- Why the sit-to-stand is so important
- Which muscles it works
- Correct form, step by step
- A simple weekly plan
- Test your strength: the 30-second chair stand
- Frequently asked questions
Why the Sit-to-Stand Is So Important
Falls are the leading cause of injury in adults over 65, and roughly one in four seniors falls each year. The strength to lower yourself into a chair and rise back up under control is the same strength that catches you when you stumble. As we age we lose muscle through a process called sarcopenia, and the large muscles of the thighs and hips fade fastest. The sit-to-stand exercise directly counters that loss with a movement your body already knows. Research consistently links better sit-to-stand performance with greater functional fitness, lower fall risk, and the ability to live independently. It is, in plain terms, a longevity move disguised as an everyday task.
Which Muscles It Works
The sit-to-stand is a compound exercise, meaning it trains several muscle groups at once — which is exactly why it is so efficient.
- Quadriceps (front of thighs) — the main driver of standing up.
- Glutes (buttocks) — power the hips through the rise.
- Hamstrings and calves — stabilize the knees and ankles.
- Core and back — keep your trunk upright and balanced.
Because it also challenges balance as your center of gravity shifts, the movement trains coordination, not just raw strength — a combination shown to cut fall risk meaningfully.
Correct Form, Step by Step
- Sit toward the front of a sturdy, armless chair with feet flat, about hip-width apart, heels slightly behind your knees.
- Cross your arms over your chest, or reach them forward as a counterweight if you need help.
- Lean your chest forward over your toes — “nose over toes” — to shift your weight.
- Press through your heels and stand up tall in one smooth, controlled motion. Do not bounce.
- Lower yourself back down slowly, taking three to four seconds. This slow descent is where much of the strength is built.
- Breathe out as you rise and in as you sit; never hold your breath.
Safety first: place the chair against a wall so it cannot slide, and keep a counter or walker within reach when starting. If you cannot yet stand without using your hands, push off the armrests or a counter, and use a higher, firmer seat — both make the movement easier until you build strength.
A Simple Weekly Plan
| Level | Sets & reps | Frequency | Tips |
|---|---|---|---|
| Beginner | 1–2 sets of 5, using hands | 3 days/week | Higher chair; rest between sets |
| Intermediate | 2–3 sets of 10, hands-free | 3–4 days/week | Slow 3-second descent |
| Advanced | 3 sets of 15, slower tempo | Most days | Lower seat; pause at the bottom; hold a light weight |
Once chair stands feel easy, you can increase the challenge by using a lower seat, slowing the tempo further, pausing at the bottom, or holding a light dumbbell or water bottles at your chest. These small adjustments keep the muscles adapting without any special equipment.
Test Your Strength: The 30-Second Chair Stand
The same movement doubles as a validated fitness test. The 30-second chair stand test, part of the Senior Fitness Test battery, counts how many times you can fully stand and sit in 30 seconds with arms crossed. It is a reliable measure of lower-body strength and a predictor of fall risk and mobility.
| Age | Below-average (women) | Below-average (men) |
|---|---|---|
| 60–64 | fewer than 12 | fewer than 14 |
| 70–74 | fewer than 10 | fewer than 12 |
| 80–84 | fewer than 8 | fewer than 10 |
Do the test safely with a chair against the wall and someone nearby the first time. Record your number, train for a month, and retest — watching that count climb is powerfully motivating.
Common Mistakes That Hold Seniors Back
A few small errors can rob you of the benefit or invite injury. The most common is dropping into the chair instead of lowering with control — that fast descent skips the most valuable strengthening portion of the movement and can jar the spine and knees. Another is keeping the chest upright the whole way; without the “nose over toes” lean, your weight stays behind your feet and standing becomes far harder than it needs to be. Many seniors also hold their breath and strain, which can spike blood pressure, so keep breathing steadily. Rushing through reps to hit a number sacrifices form, while skipping days altogether stalls progress, because muscle responds to regular, repeated stimulus. Finally, do not let fear keep you from trying: set the chair against a wall, keep support within reach, and start with a higher seat. The goal is steady, controlled repetitions you can do safely — building from where you are today rather than where you wish you were.
Frequently Asked Questions
How many sit-to-stands should a senior do per day?
Start with 1–2 sets of 5 and build toward 2–3 sets of 10–15 on most days. Consistency matters more than a big number. Even practicing a few quality reps each time you get out of a chair adds up.
What if I can’t stand up without using my hands?
That is a normal starting point. Use the armrests or a counter to assist, and begin with a higher, firmer chair. As your legs strengthen, gradually use your hands less until you can rise hands-free. Progress is the goal, not perfection.
Is the sit-to-stand safe with knee arthritis?
For most people with arthritis, gentle chair stands strengthen the muscles that support the knee and can reduce pain over time. Move within a comfortable range, avoid sharp pain, and check with your doctor or physical therapist if you have had a recent joint replacement or severe arthritis.
How soon will I see results?
Many seniors notice easier standing and steadier balance within three to four weeks of regular practice, with measurable gains on the 30-second test by the second month. Strength built this way translates directly into daily independence.
Related Articles You May Find Helpful
- Senior Fitness & Exercise Guide 2026
- Step-Ups for Seniors 2026: Leg Strength & Fall Defense
- Seated Marching for Seniors 2026: Strength & Fall Defense
- Balance Exercises for Seniors Over 70: 8 Proven Moves
- Fall Prevention for Seniors 2026: 10 Proven Strategies
Sources
- Shirley Ryan AbilityLab — 30 Second Sit to Stand Test (RehabMeasures Database)
- National Institute on Aging (NIH) — Strength and Balance Exercises for Older Adults
- Journal article (2021), NIH/PMC — Performance on sit-to-stand tests in relation to functional fitness and sarcopenia in community-dwelling older adults
This article is for educational purposes only and is not medical advice. Check with your doctor before starting a new exercise program, especially after surgery or injury. See our Medical Disclaimer.